Edit: Also check out my new post on the Top 5 Purchases for Your Coleman 17B Camper!
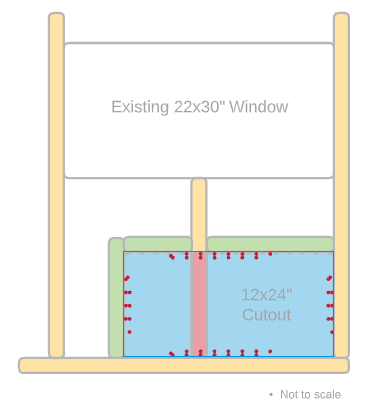
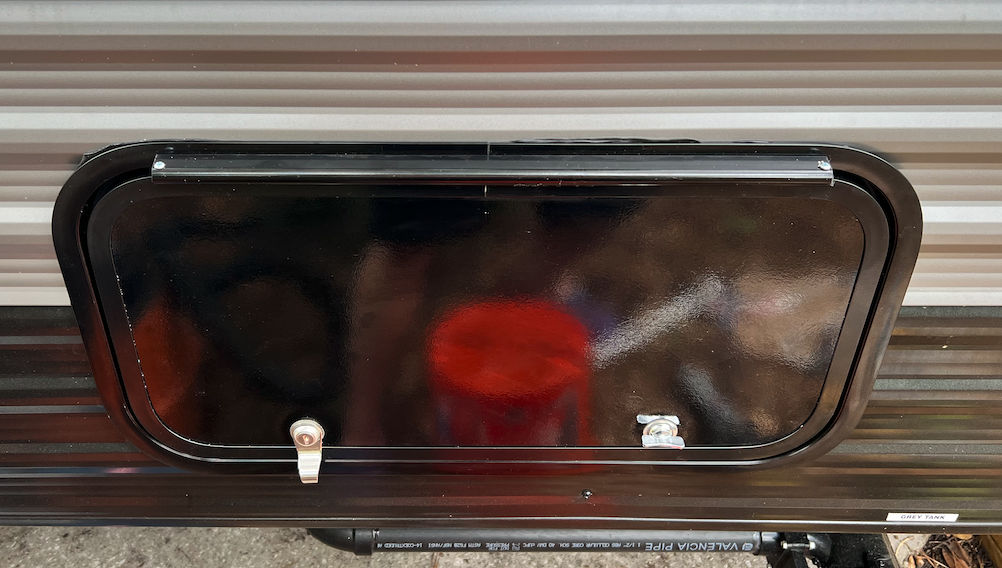
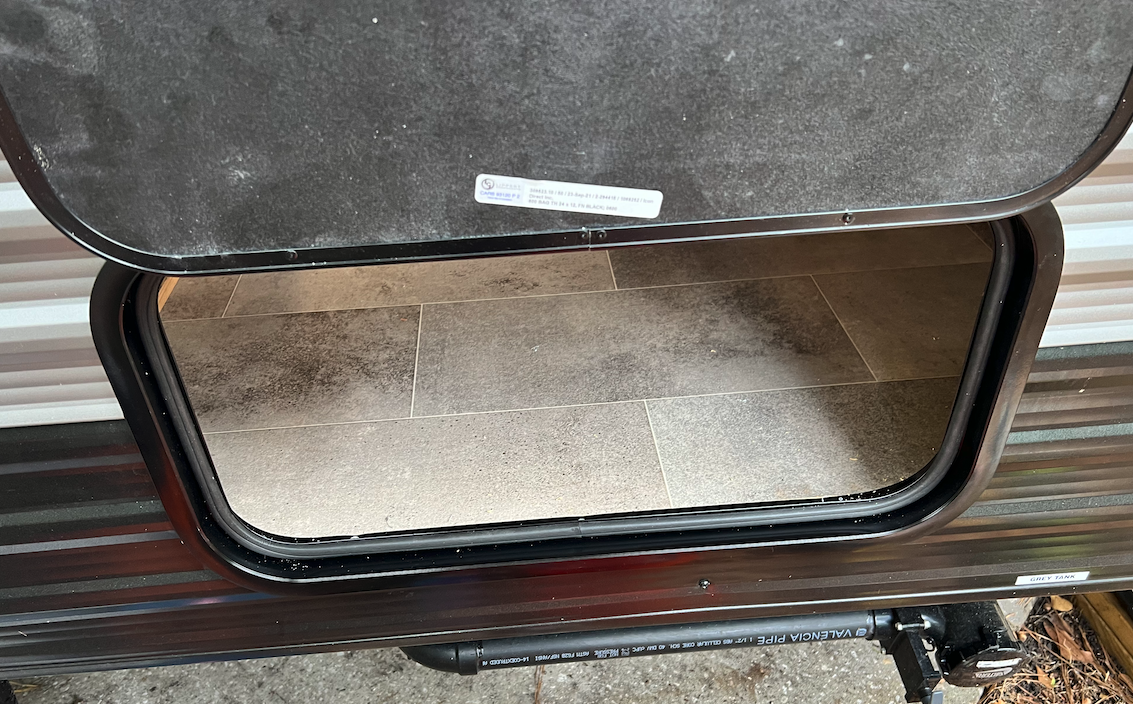
We somewhat recently traded in our pop-up camper for an amazing Coleman Lantern 17B camper. Since this camper is pretty popular, I thought I’d document some of the improvements I’ve made, starting with this external storage door addition. There is a sizable storage area under the bottom bunk, but it is only accessible from the inside by lifting up the board that supports the bottom bunk mattress. Not ideal. Taking from the experiences of others in the super helpful 17B Facebook Group, I tackled the intimidating project of slicing a sizable hole into the side my brand new camper to add a 12×24″ external storage door.
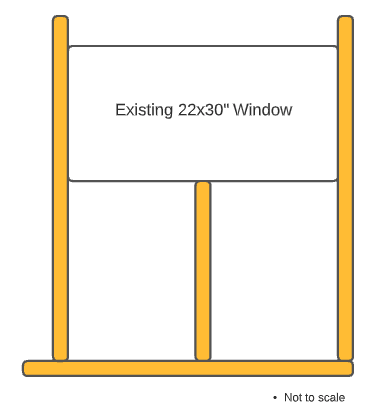
I started on the inside of the camper by cutting a small section of the wall board away from where the first stud was bordering the window – the window is between two studs, with another stud in the middle, for reference.
This is what’s behind the wall board in terms of studs:
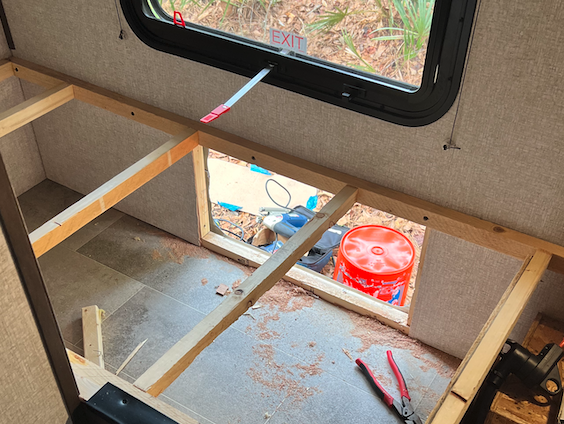
Using the bottom plate and the stud I exposed as reference points, I cut the inside portion of a 12×24 square with a rotary tool cutting bit for the opening. I used a tape measure for this portion, not a template. Once I had this rectangle cut out, I pulled out the insulation – most of it came out in complete pieces, I only had to trim one area, visible on the left of the opening in this photo:
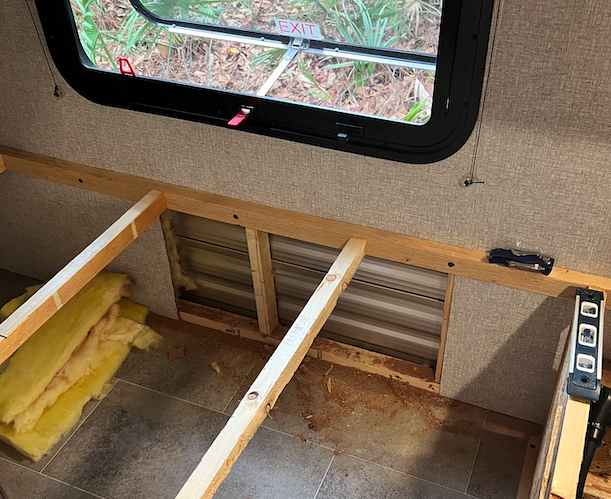
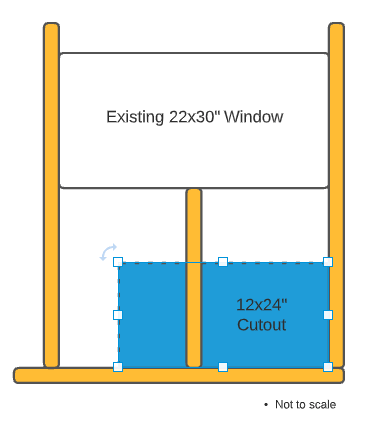
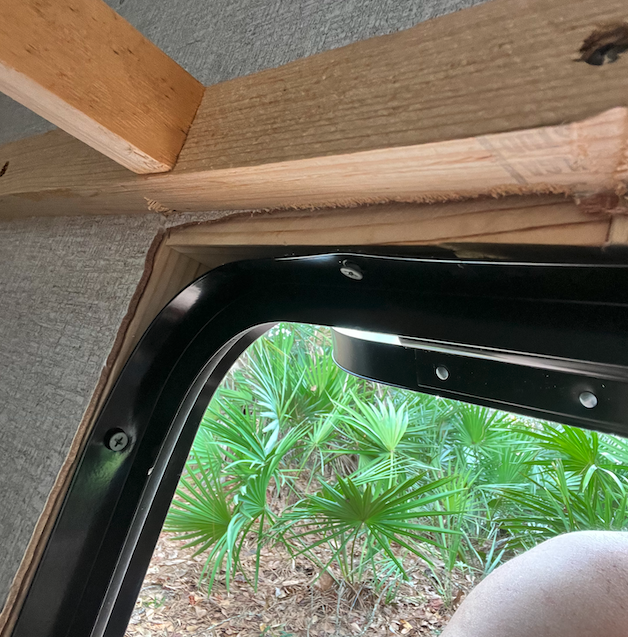
Sadly, the portion of the stud visible needs to go, but I wanted to build in some extra support as well as provide a structure to mount the storage door. Using some 2×2″ lumber, I fabricated supports (in green below) before cutting the existing stud away (in red). I attached this framing to the existing studs and bottom plate by toeing in some exterior wood screws.

Now it was time to cut the siding – the scariest part, to me. To mark my reference points, I used my Dremel Multi-Max Oscillating tool to cut 4 lines in the siding, from the inside, resting the tool blade against the studs to ensure alignment.
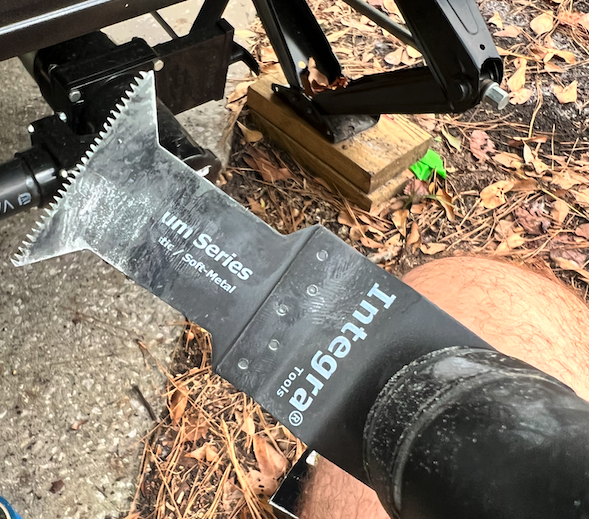
Heading outside, I used quite a bit of wide painters tape to mask a rough area based on the reference cuts. I made a cardboard template based on the storage door itself, lined it up with the reference cuts, and traced around it with a sharpie. For the outside portion of the cutting, I used a jigsaw and a fine-toothed metal blade, and it went without a hitch.

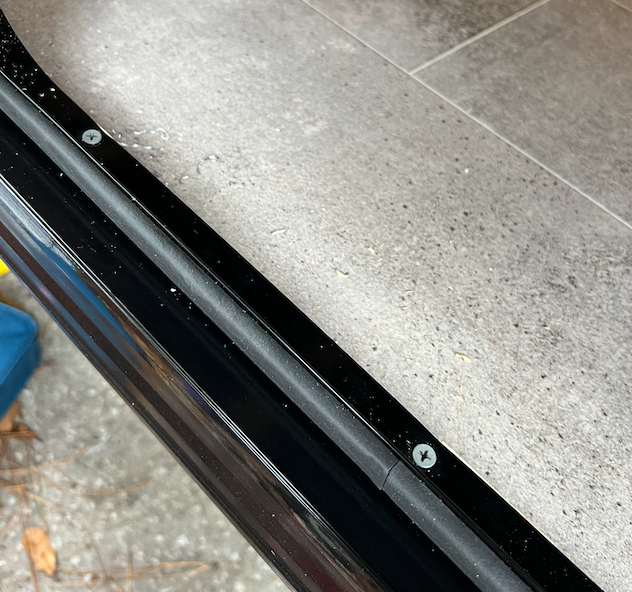
The hard part was done! I used butyl sealing tape around the frame of the storage door, slid it into place, and secured it with ten 1-5/8″ exterior grade wood screws. I drilled small pilot holes for these mounting screws, and that made life easier.
(Not pictured because I’m terrible at silicone) For extra protection from the elements, in addition to the butyl tape I used around the exterior of the door frame, I used copious amounts of clear silicone. I also added a magnetic door catch! I’m really happy with the results!
Disclosure: Some links in the post are affiliate links. If you choose to buy anything, I will make a small commission which will be at no additional cost to you.
One thought on “Woah! More accessible storage for a Coleman Lantern 17B!”